Skeleton Cookies
These Skeleton Cookies are spooky, sweet, and just the right amount of creepy-cute! Crisp, chocolatey, and shaped like little skeletons, they’re the perfect treat to add some Halloween fun to your dessert table. Grab your cookie cutters and bring these bone-chilling treats to life!
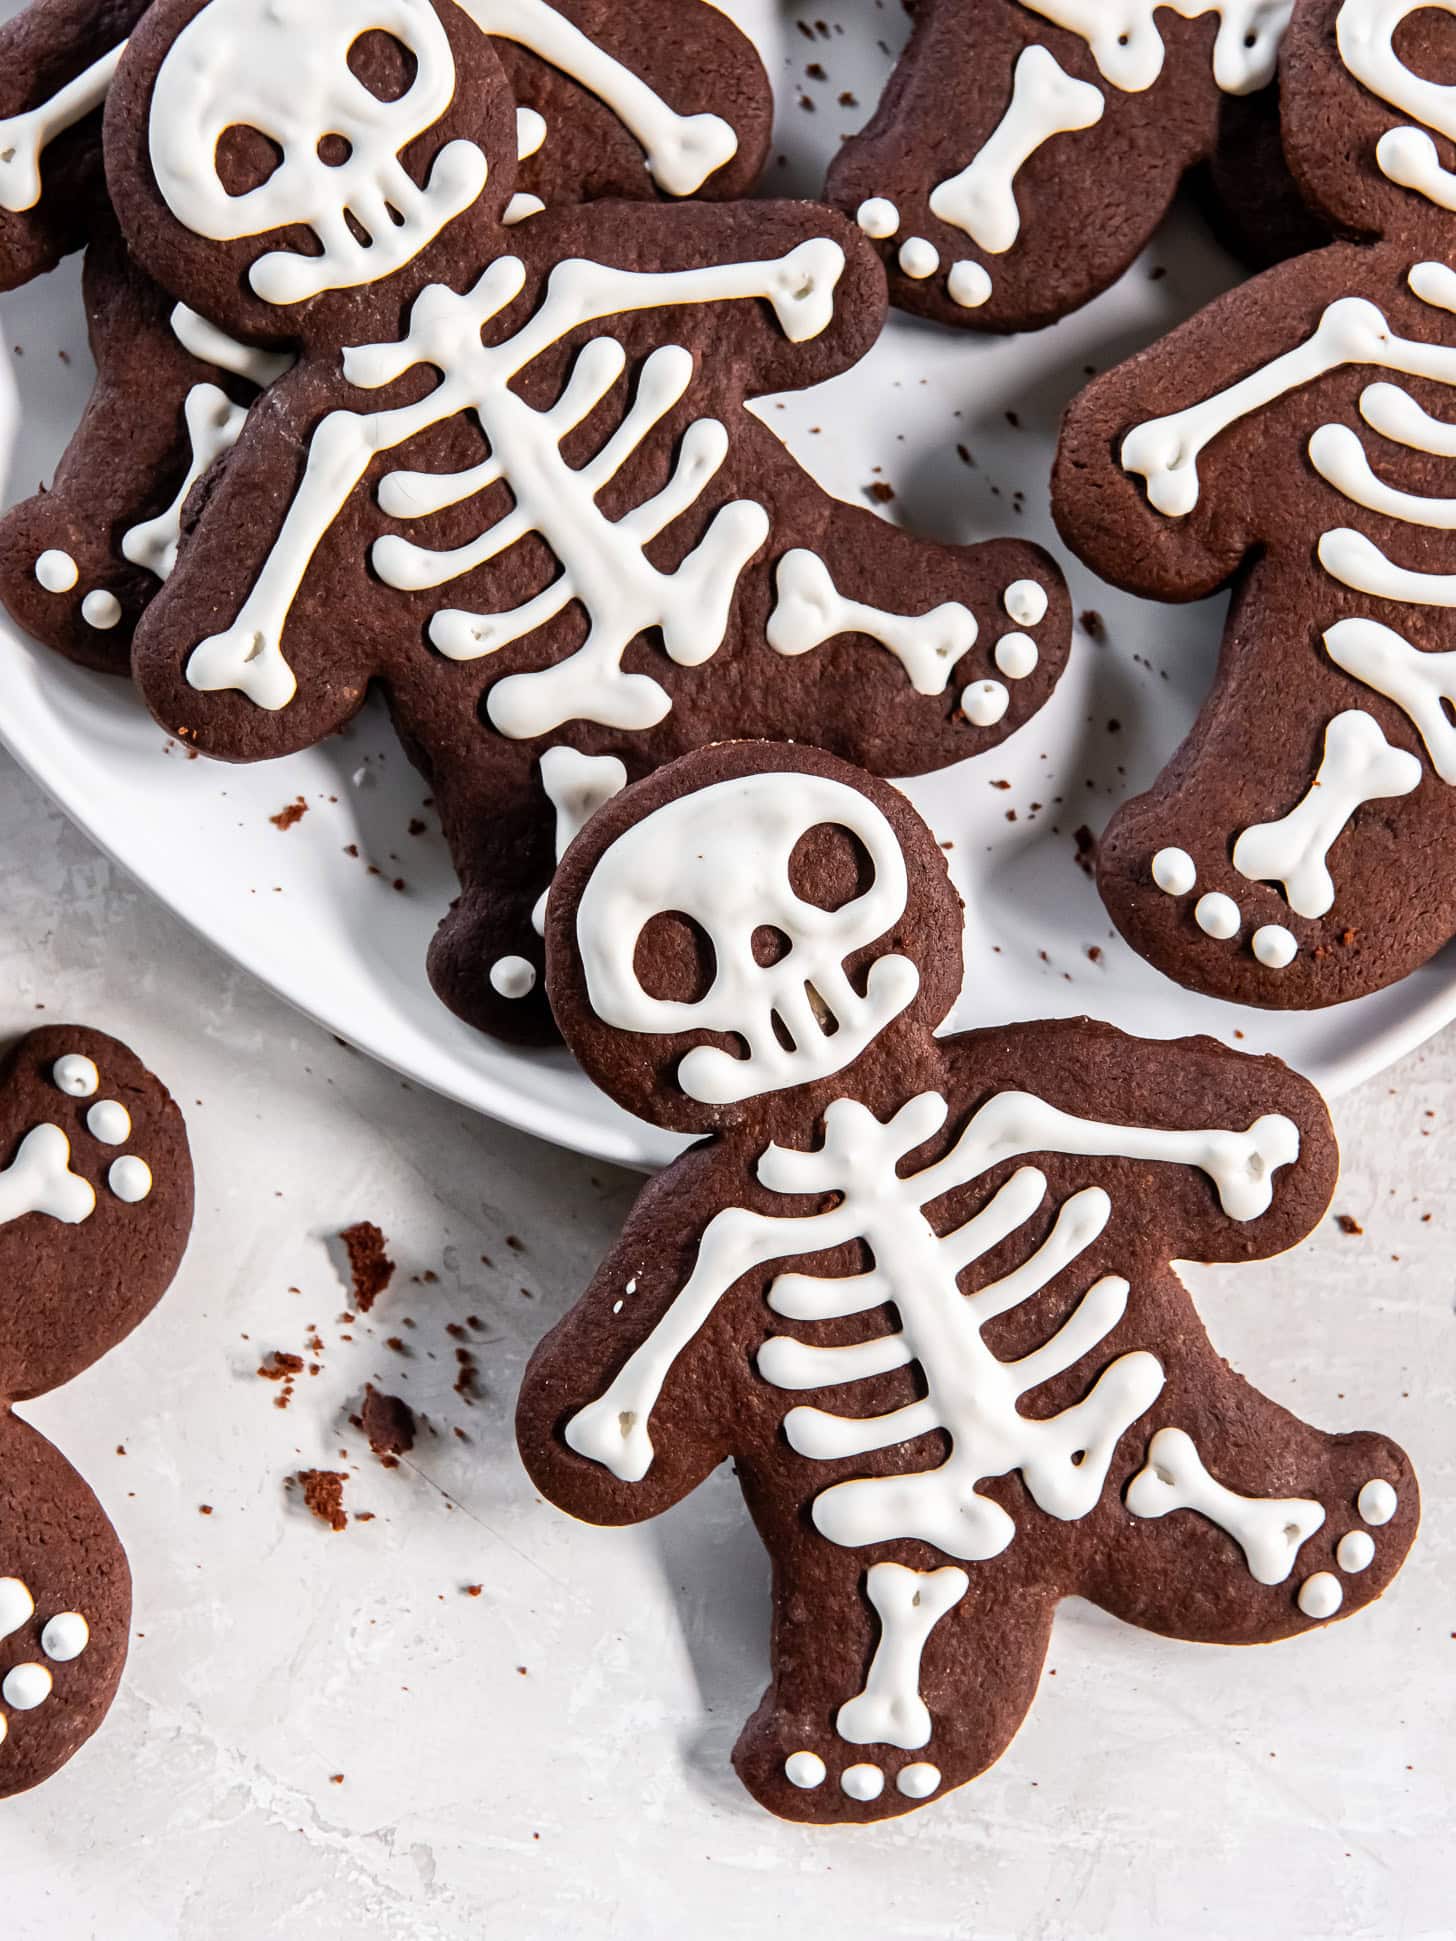
These skeleton cookies are a spooky twist on my chocolate cut-out sugar cookies. They are crisp on the edges, soft in the center, and so much fun to decorate! Each cookie is shaped like a little skeleton, then brought to life with royal icing “bones” that pop against the rich cocoa base. They’re equal parts fright and delight, perfect for Halloween parties, bake sales, or a cozy night of festive baking with the kids.
If you love these, don’t miss my ghost brownies and easy Halloween cupcakes! They’re just as cute, chocolatey, and sure to disappear fast from any Halloween gathering!
Why You’ll Love This Recipe
- Spooky-cute vibes: These skeleton cookies are as fun to decorate as they are to eat, perfect for adding a playful (and slightly creepy) touch to your Halloween spread along with graveyard brownies.
- Chocolate lover’s dream: A rich, cocoa-packed twist on my cut-out sugar cookie recipe, giving you that deep, fudgy flavor in every bite.
- Fun for all ages: Whether you’re baking with kids or hosting a Halloween party, everyone will love these iced skeleton cookies!
- Make-ahead friendly: The dough chills beautifully, and the baked cookies stay fresh for days, ideal for prepping ahead of your Halloween celebration.
Ingredient Notes
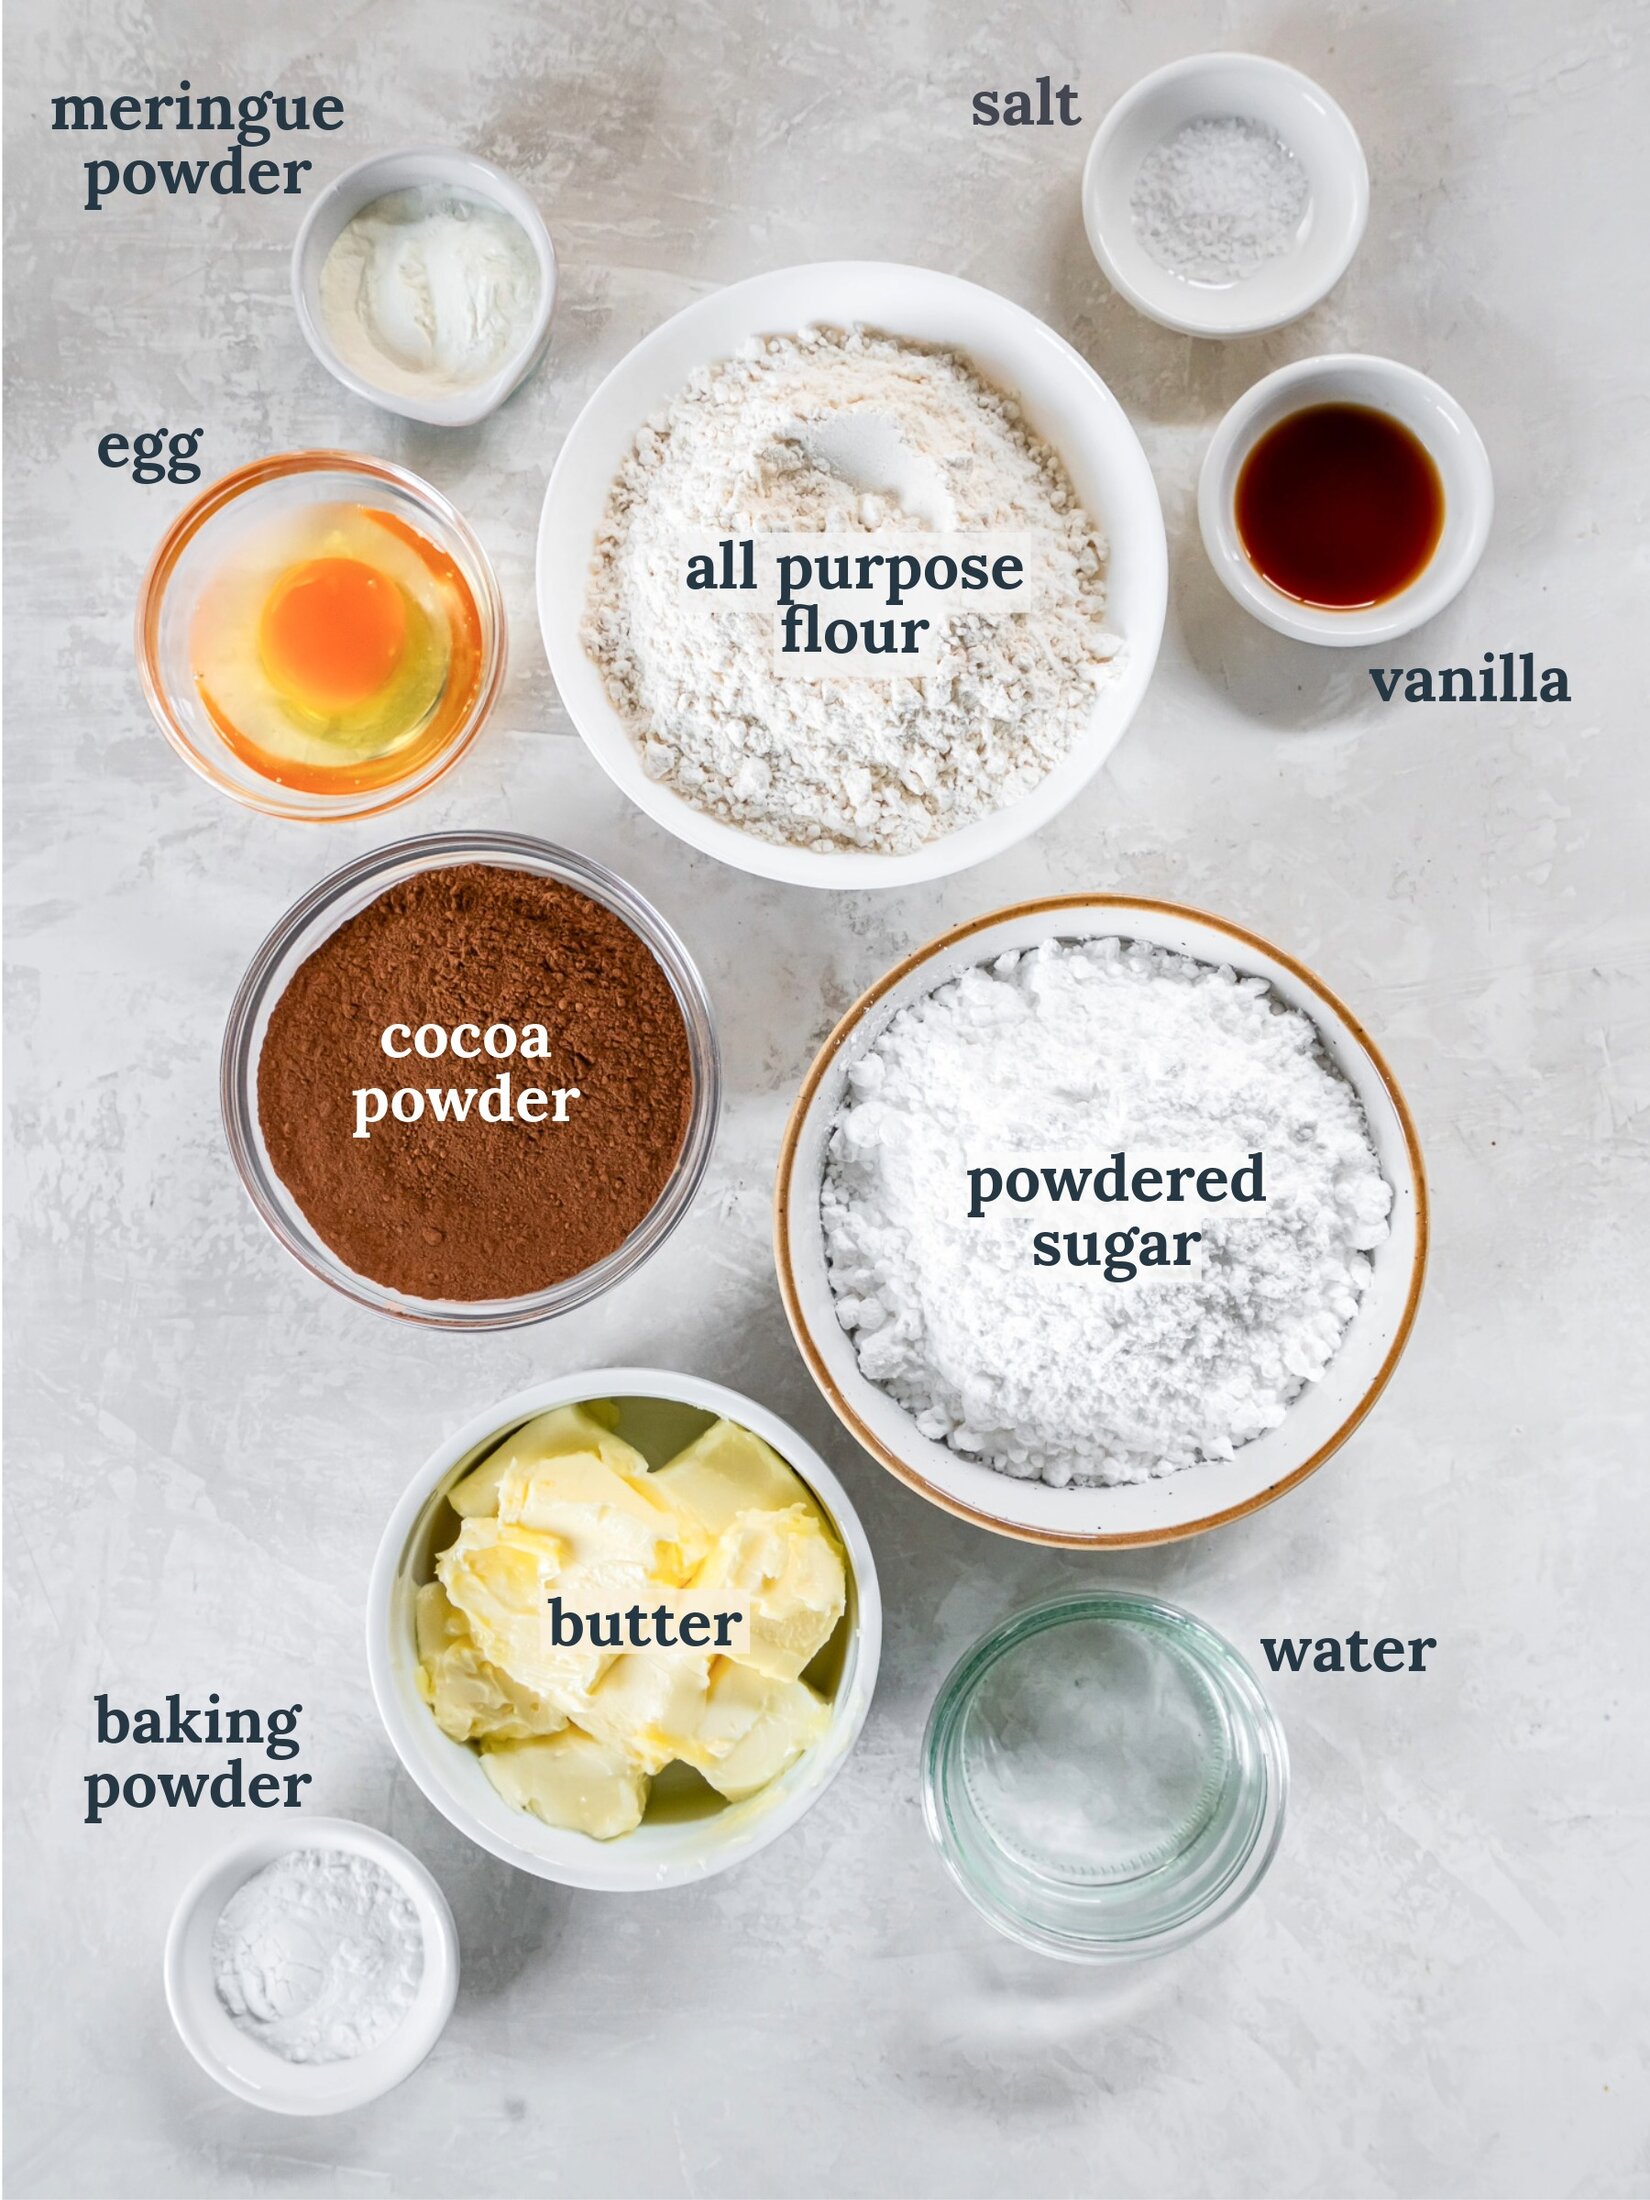
- All-purpose flour: Provides structure for the cookies and keeps them sturdy enough for cut-out shapes.
- Unsweetened cocoa powder: Gives the cookies their deep chocolate flavor. Use a high-quality Dutch-process cocoa for the richest taste.
- Baking powder: Helps the cookies puff slightly so they’re soft but still hold their shape.
- Salt: Balances the sweetness and enhances the cocoa flavor.
- Unsalted butter: Adds richness and that classic buttery flavor. Make sure it’s softened for easy mixing.
- Powdered sugar: Creates a tender, melt-in-your-mouth texture instead of a grainy one you’d get with granulated sugar. It’s also used for the base of the smooth, glossy royal icing.
- Egg: Binds everything together and adds just the right amount of moisture.
- Vanilla extract: Rounds out the chocolate flavor with a hint of warmth and sweetness.
- Meringue powder: Gives the icing structure and helps it harden to a perfect decorating consistency. If you can’t find it at your local grocery store or specialty cook store, you can find meringue powder on Amazon.
- Warm water: Controls the icing’s texture, add a little at a time until it’s thick but pipeable.
Refer to the recipe card for ingredient details and measurements.
Recipe Variations
Spiced chocolate. Add a pinch of cinnamon, nutmeg, or pumpkin spice to the dough for a subtle fall flavor.
Colored icing. Tint the royal icing with gel food coloring to create rainbow or glow-in-the-dark skeletons.
Chocolate-dipped bones. After decorating, dip the feet or hands of the skeletons in melted chocolate for extra fun.
Different shapes. You can easily use this chocolate cookie dough to make a variety of cut-out shapes beyond skeletons! Simply roll it out and swap in any cookie cutters you love — ghosts, bats, pumpkins, or even festive seasonal shapes.
How to Make Skeleton Cookies
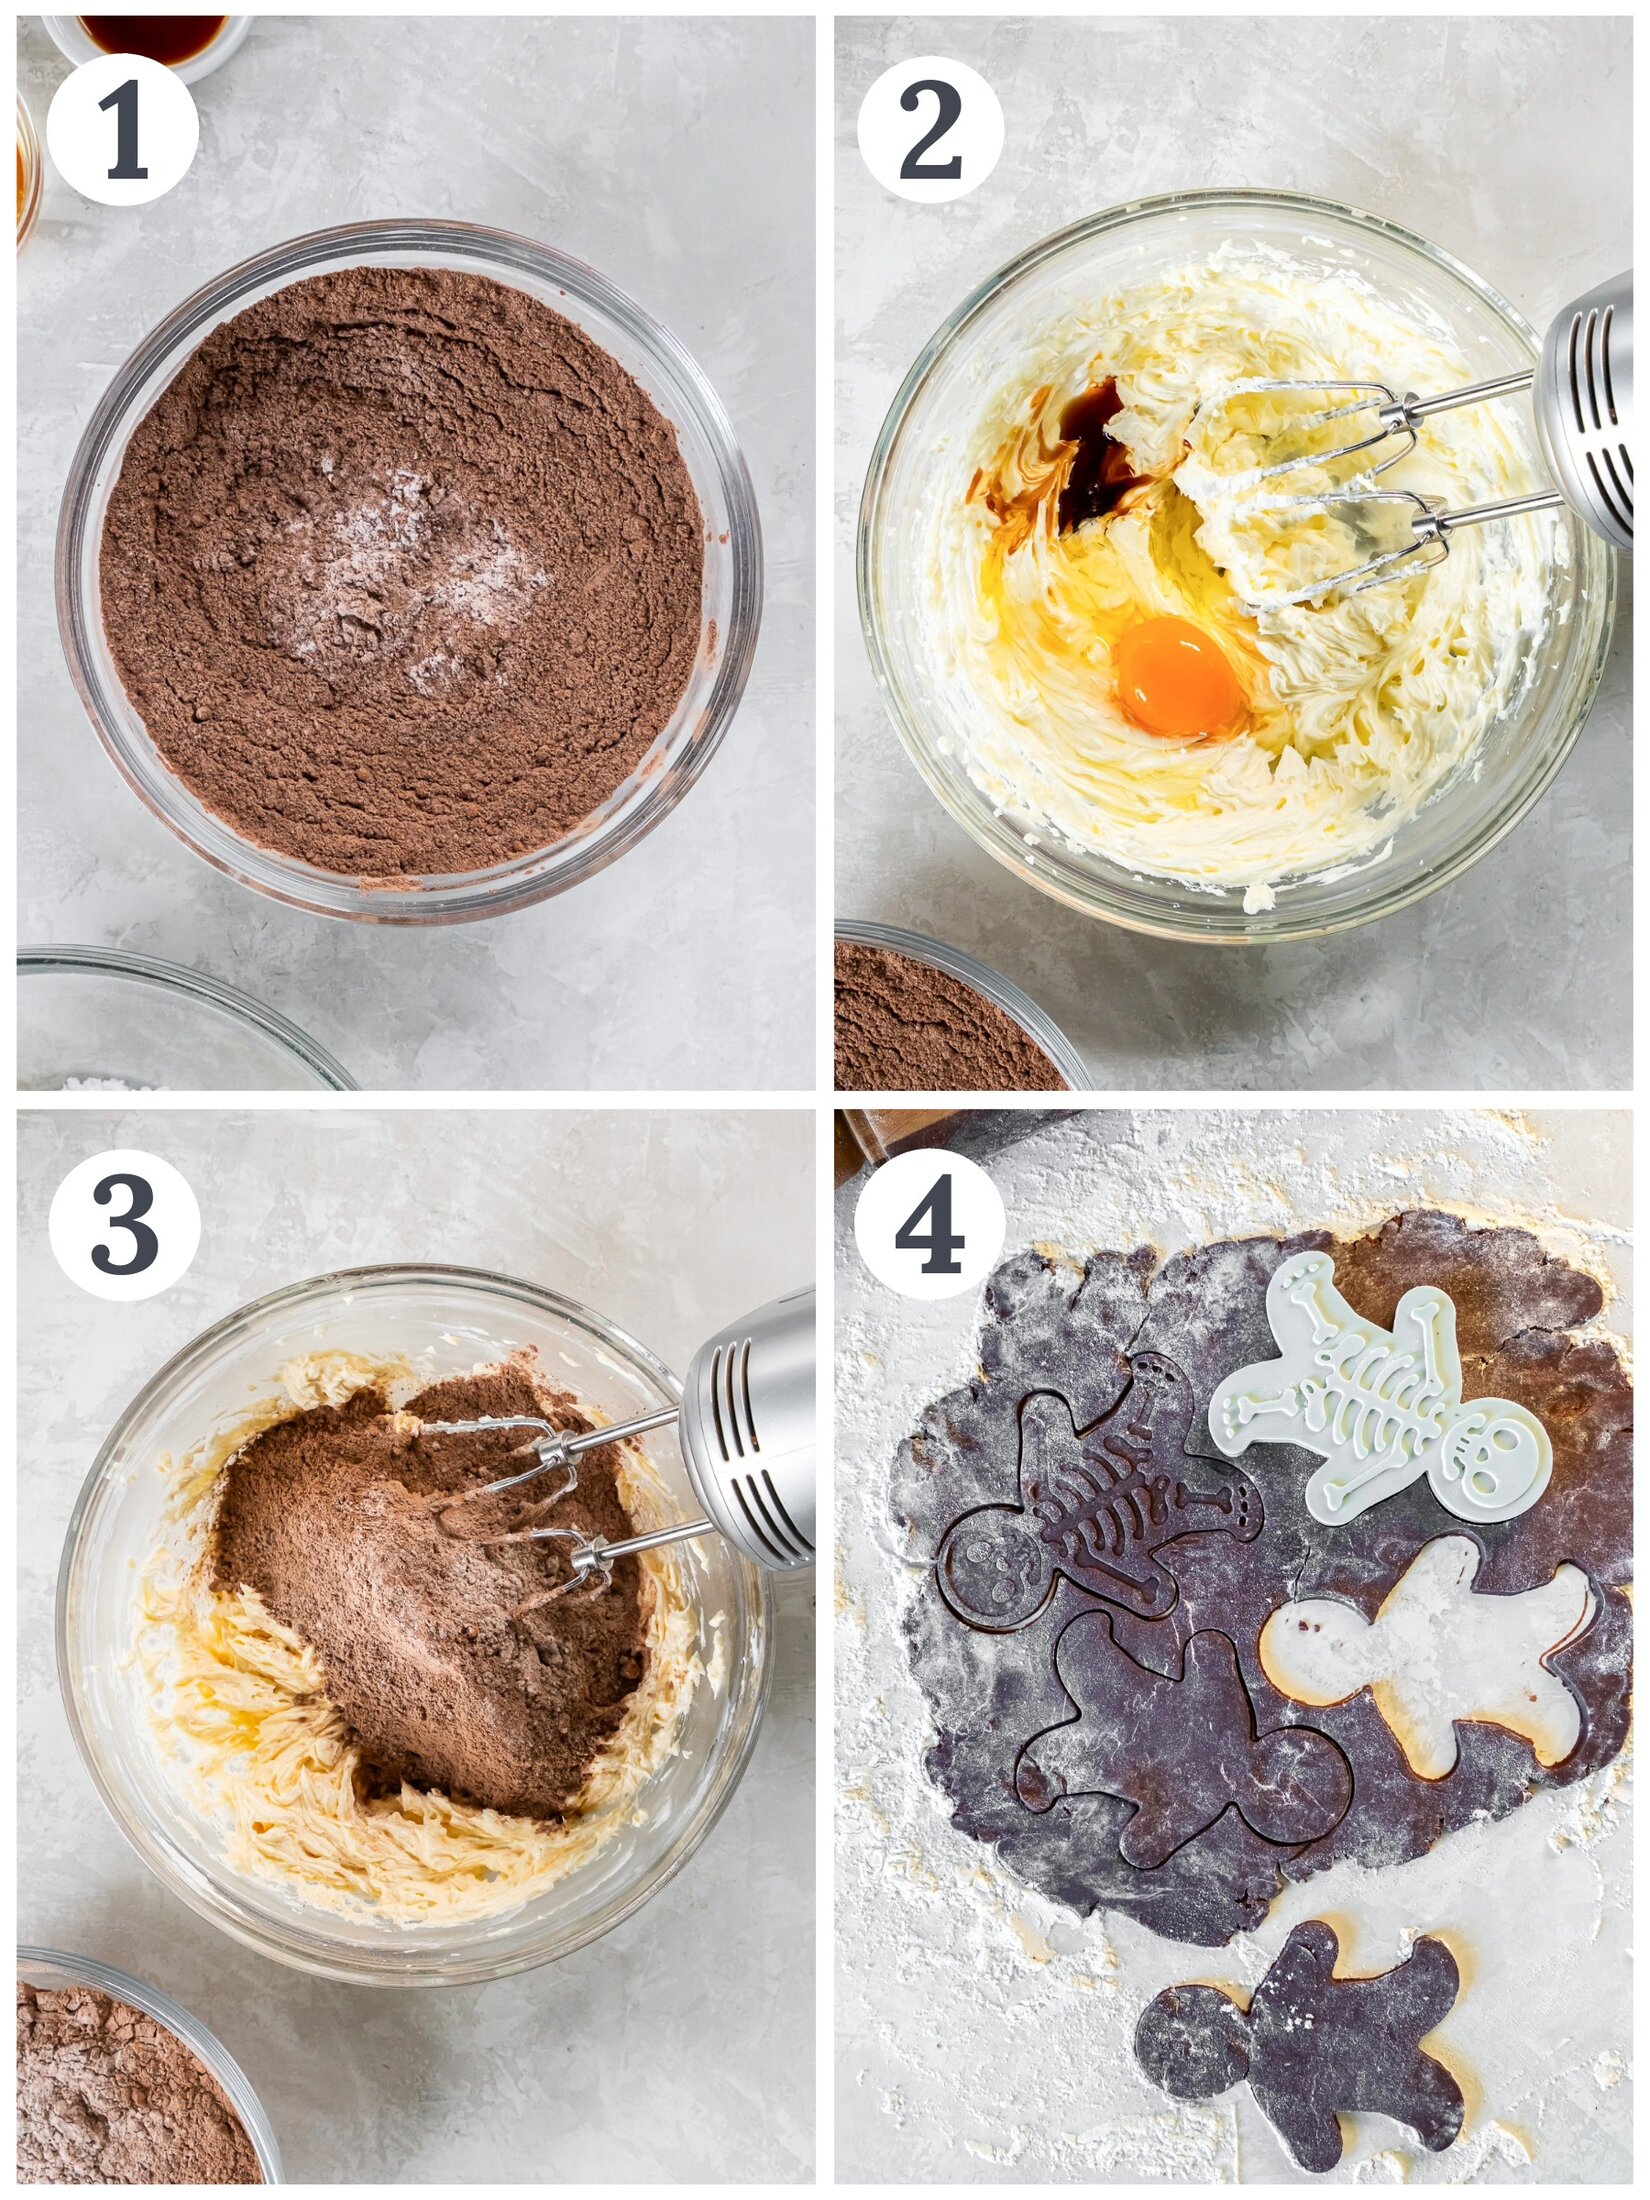
- Whisk together flour, cocoa powder, baking powder, and salt; set aside.
- In a large bowl, beat butter and powdered sugar until light and fluffy, 1–2 minutes. Add egg and vanilla; beat 30 seconds, scraping sides as needed.
- On low speed, gradually add flour mixture until dough mostly sticks to the paddle but doesn’t stick to fingers.
- Flour work surface and roll dough ¼-inch thick. Cut with skeleton cookie cutter, pressing firmly to show bone details. Place 2 inches apart on baking sheet; reroll scraps as needed. Bake 8–10 minutes, rotating halfway. Cool 2 minutes on sheet, then transfer to wire rack.
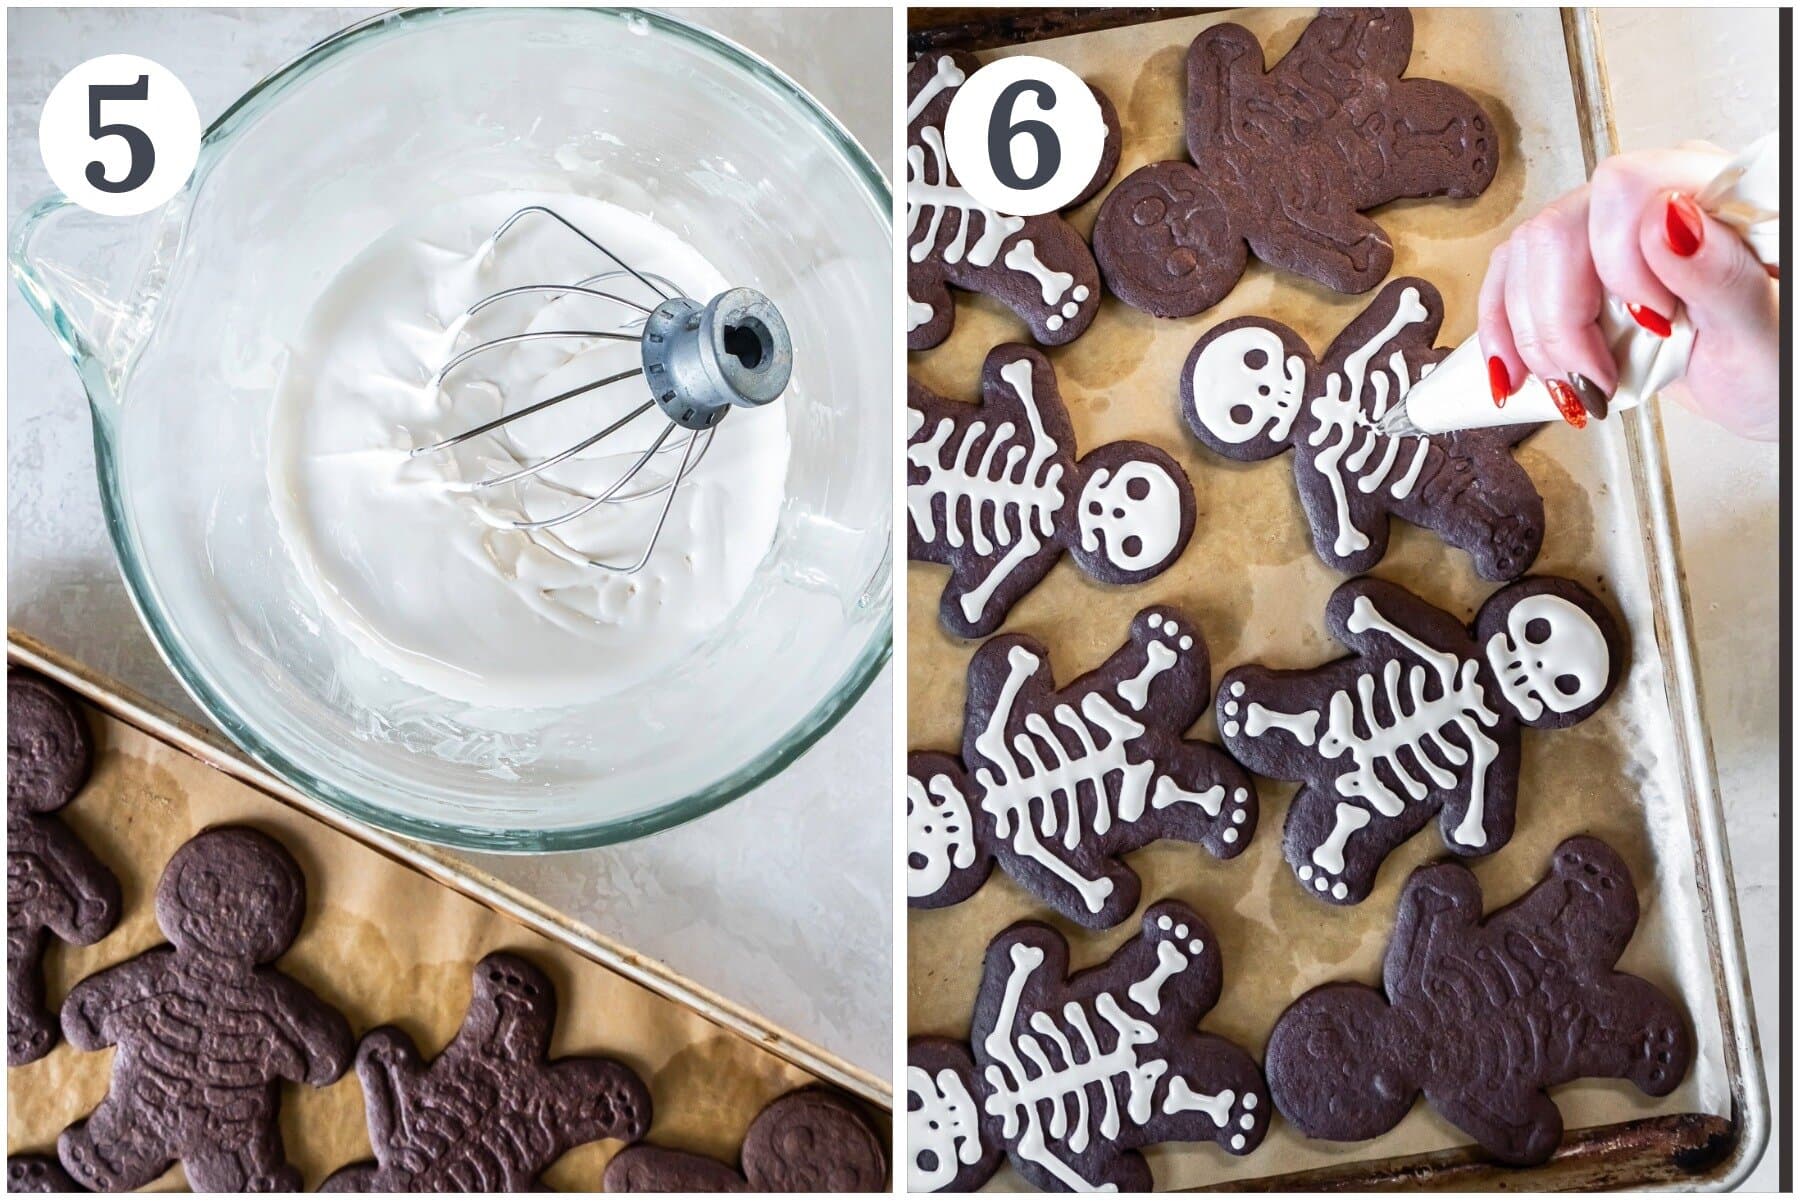
- Whip meringue powder and water in a large bowl until foamy, about 3 minutes. Add powdered sugar and vanilla; beat on medium until stiff peaks form, about 3 more minutes. Thin with water, a drop at a time, if needed.
- Transfer to a piping bag with a small round tip (Wilton #2 works) and fill in the bone indentations to create your skeleton.
Expert Tips
Even thickness. Roll dough evenly (¼-inch) for consistent baking and uniform cookies.
Cool before icing. Ensure cookies are completely cooled to prevent royal icing from running.
Practice piping. If you’re new to decorating, practice your skeleton design on parchment before piping on the cookies.
Dip the cookie cutters in flour. Lightly dip your cookie cutter in flour before each use to keep the dough from sticking and ensure clean, crisp shapes. before cutting the dough.
Make Ahead and Storage Tips
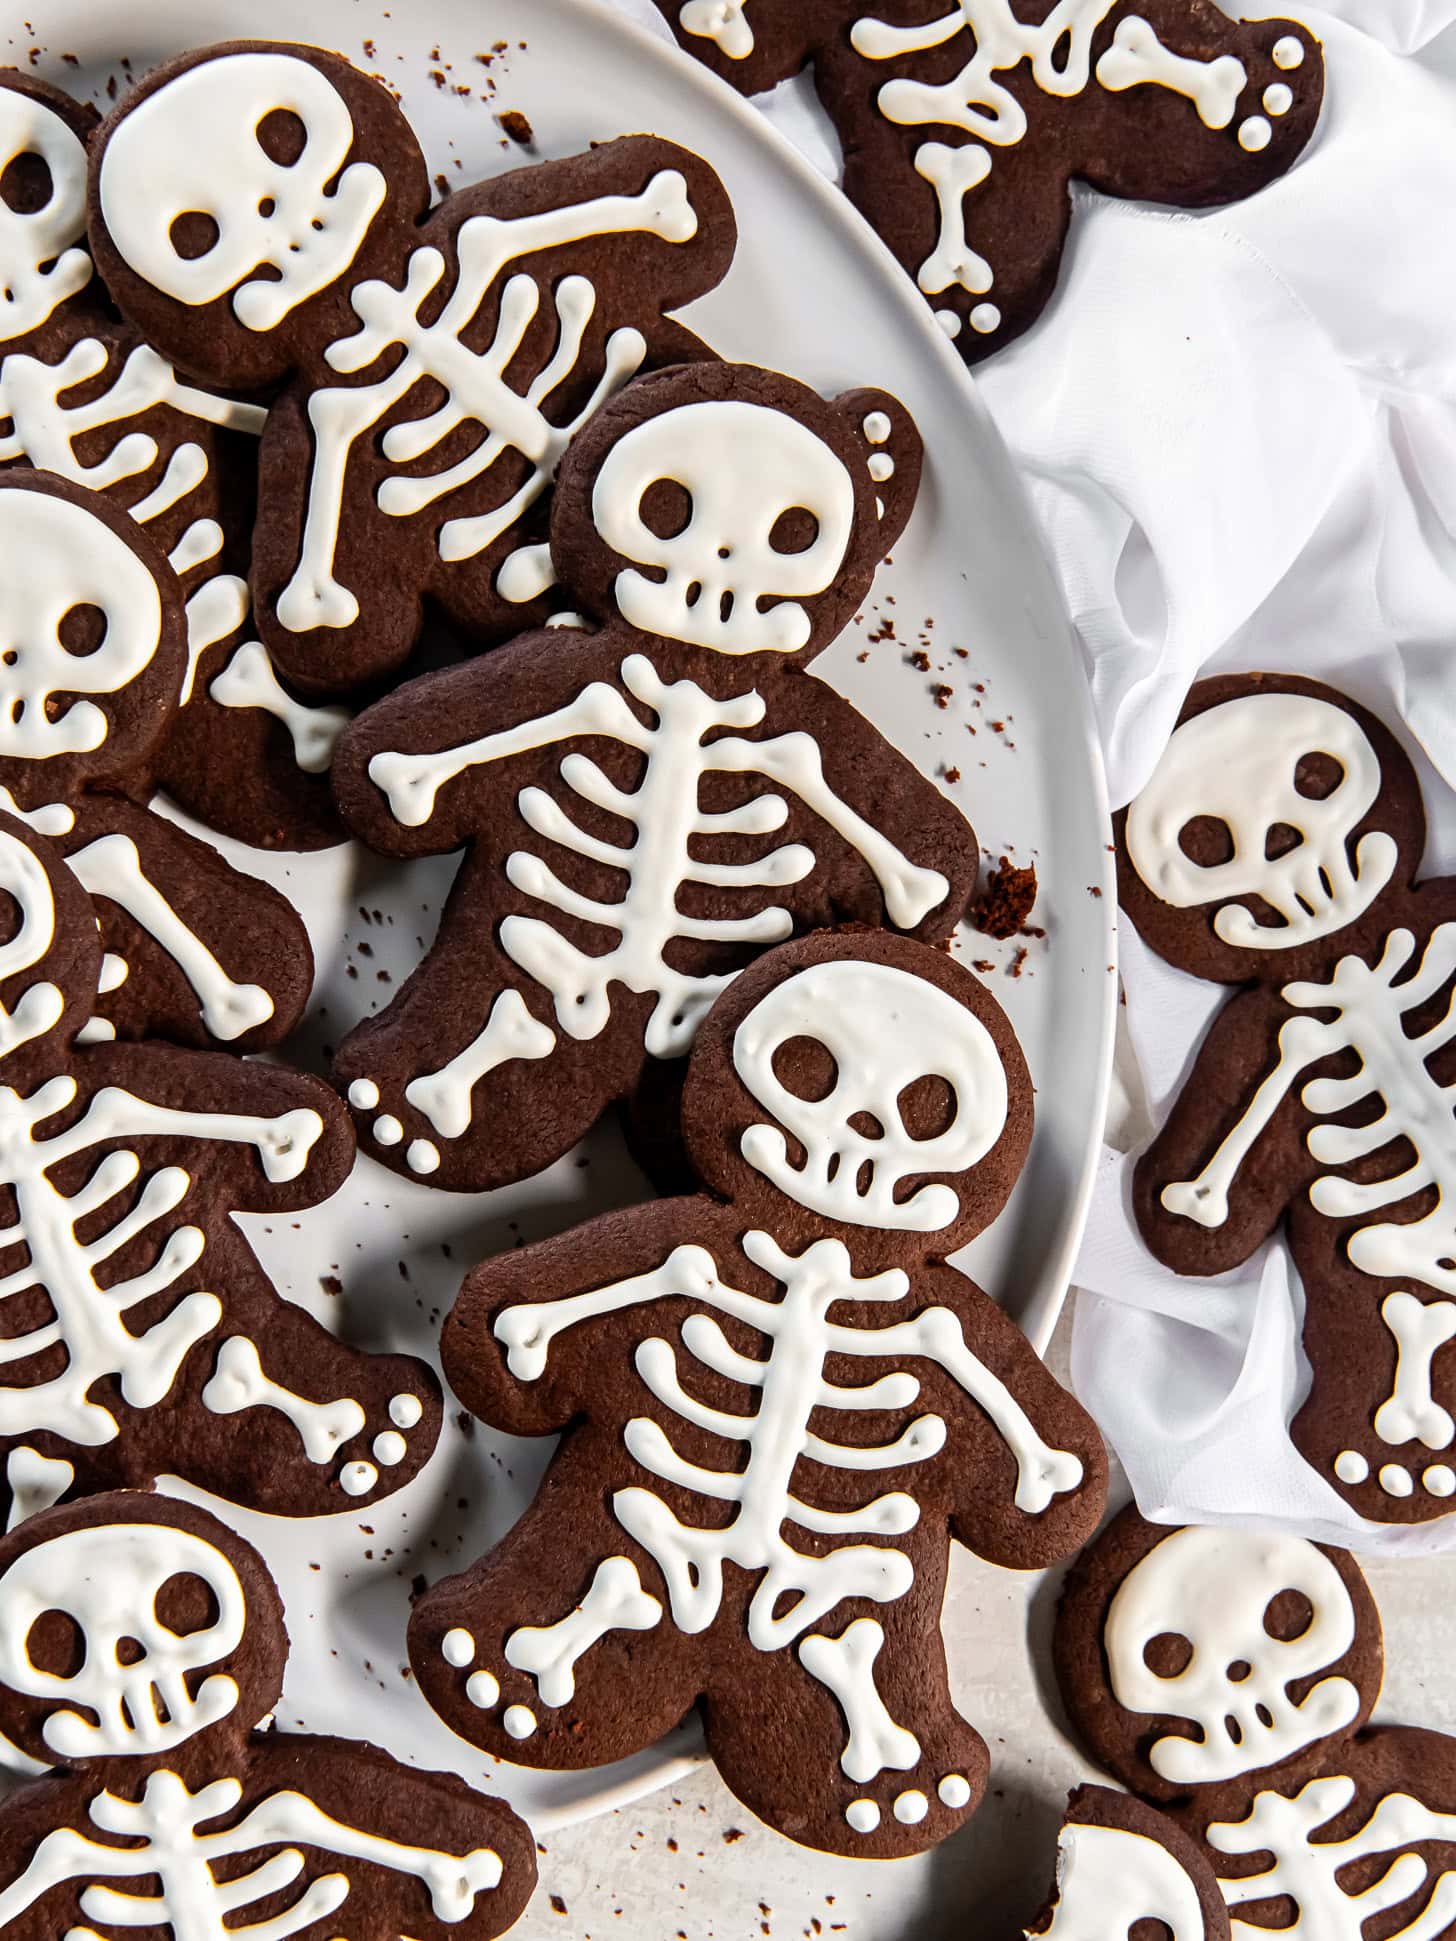
Store baked cookies in an airtight container at room temperature for up to 5 days.
Freezing dough. Wrap dough tightly in plastic wrap or place in an airtight container and freeze for up to 3 months. Thaw in the refrigerator before rolling and cutting.
Freezing baked cookies. Wrap completely in plastic wrap and store in an airtight container for up to 3 months to prevent freezer burn.
Make-ahead. Dough can be prepared and refrigerated for up to 48 hours. Bring to room temperature before rolling and cutting.
Recipe FAQ
Your cookies likely spread because the butter was too soft or the dough too warm. This happens often in warm or humid conditions. To prevent spreading, chill the shaped cookies on the baking sheet in the refrigerator for about 15 to 30 minutes before baking.
Adjust the consistency by adding water a drop at a time for thinner icing or more powdered sugar for stiffer icing.
You can definitely use store-bought icing to decorate your cookies, but keep in mind that it will not give the same smooth, detailed finish as royal icing.
Related Recipes
Get into the Halloween spirit with even more fun and festive recipes perfect for treats, parties, and spooky celebrations!
Did you love this recipe? Please leave a 5-star 🌟🌟🌟🌟🌟 rating in the recipe card below and if you REALLY loved it, consider leaving a comment further down the page.

Get the Recipe: Chocolate Skeleton Cookies
Ingredients
Cookies
- 2 cups (250 g) all-purpose flour
- ¾ cup (72 g) unsweetened cocoa powder
- 1 ½ teaspoons baking powder
- ½ teaspoon salt
- 1 cup (226 g or 2 sticks) unsalted butter, room temperature
- 1 ½ cup (187 g) powdered sugar
- 1 large egg, room temperature
- 2 teaspoons pure vanilla extract
Icing
- 2 ⅔ cups (320 g) confectioners' sugar, sifted
- 2 Tablespoons meringue powder
- 2 teaspoons pure vanilla extract
- 5-6 Tablespoons warm water
Instructions
Cookies
- Preheat oven to 400° F. Line baking sheets with parchment paper and set aside.
- In a bowl, whisk together the flour, cocoa powder, baking powder, and salt. Set aside.
- In a large bowl, combine softened butter and confectioners’ sugar using a hand mixer.¹ Beat until light and fluffy, about 1 to 2 minutes. Add the egg and vanilla, and beat until thoroughly incorporated, about 30 seconds. Scrape down sides as necessary.
- With mixer on low, slowly add flour mixture to the bowl. The dough is ready when most of it sticks to the paddle. When touched, it has a little give, but does not stick to fingers.
- Flour the work surface and roll dough to about 1/4-inch thick, using flour for dusting as necessary (flour will dissolve and not show up on the cookies). Use skeleton cookie cutter to cut cookies. Press firmly enough that the bone indentations appear in the dough. Place cookies on prepared baking sheet about 2 inches apart. Gather scraps and reroll dough when necessary.
- Bake for 8 to 10 minutes, rotating halfway through. Allow cookies to cool on baking sheet for 2 minutes, then transfer to wire rack to cool completely.
Icing
- Place the meringue powder and water in a large mixing bowl, and whip with the whisk attachment until foamy, about 3 minutes.
- Add the powdered sugar and vanilla. Whip on medium speed until very stiff and thick, about 3 minutes. The royal icing should hold a medium peak. If necessary, thin with additional water, a drop at a time, to get the desired consistency.
- Transfer icing to an icing bag fitted with a small round tip (I used Wilton #2). Fill in the bone indentations with icing to make the skeleton.


