Cookie Ice Cream Sandwiches (Homemade Chipwich)
Learn how to make one of the best summertime desserts—the Chipwich. These homemade chocolate chip cookie ice cream sandwiches are simply delicious and easy to make from scratch!
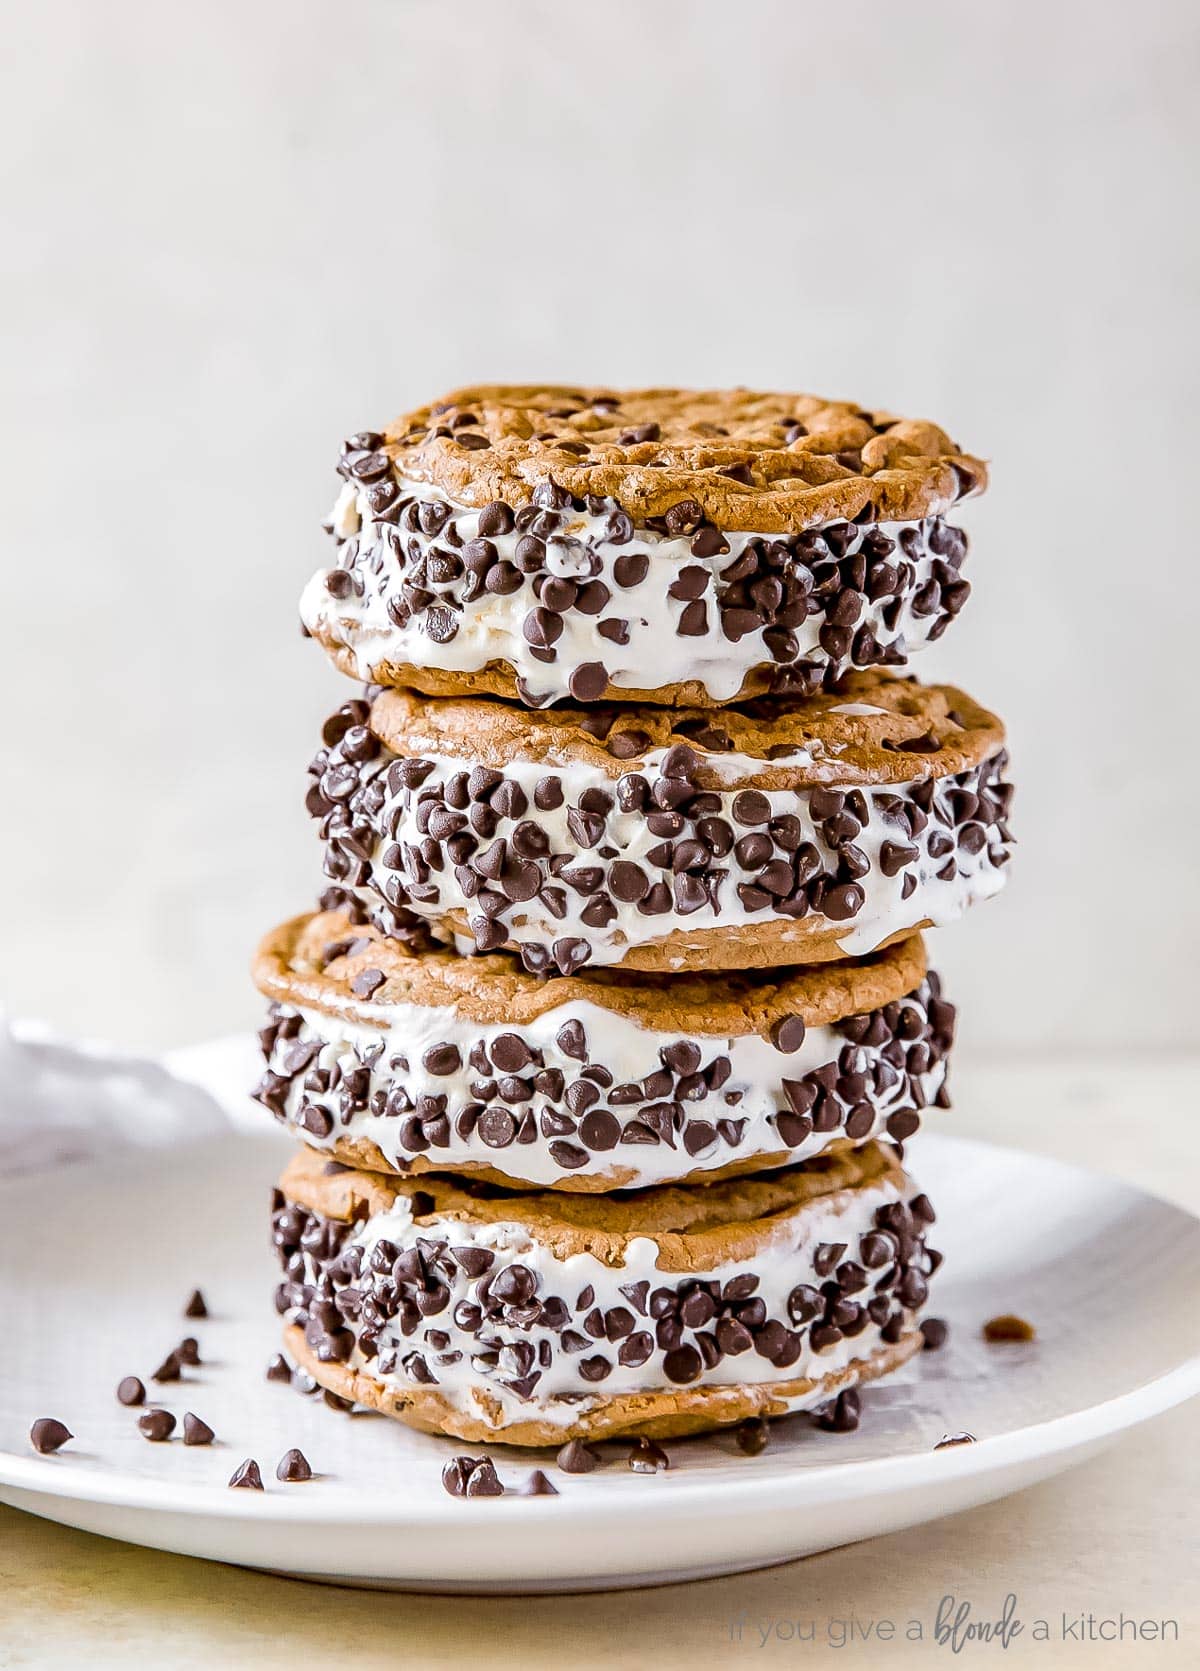
With two desserts in one, this Good Humor ice cream sandwich was unquestionably one of my favorites as a kid. Now as an adult I love making them at home! The homemade Chipwich is made by taking two chocolate chip cookies and sandwiching vanilla ice cream in the center, then rolling the edges in mini chocolate chips. Believe me when I say, you will want to have this treat in your freezer all summer long.
Why You’ll Love This Recipe
- Nostalgic. If the Chipwich was your choice at the Good Humor truck, then you’ll surely love the memories accompanied with this dessert.
- Easy to make. All you need are homemade chocolate chip cookies and vanilla ice cream!
- No chilling the dough, which means this dessert is ready quickly!
- Freezer friendly. Kind of goes without saying, but these homemade Chipwiches do keep well in the freezer for up to 1 month.
- Summer treat! When a hot summer day rolls around, you’ll be happy to have this dessert in the freezer.
Ingredient Notes
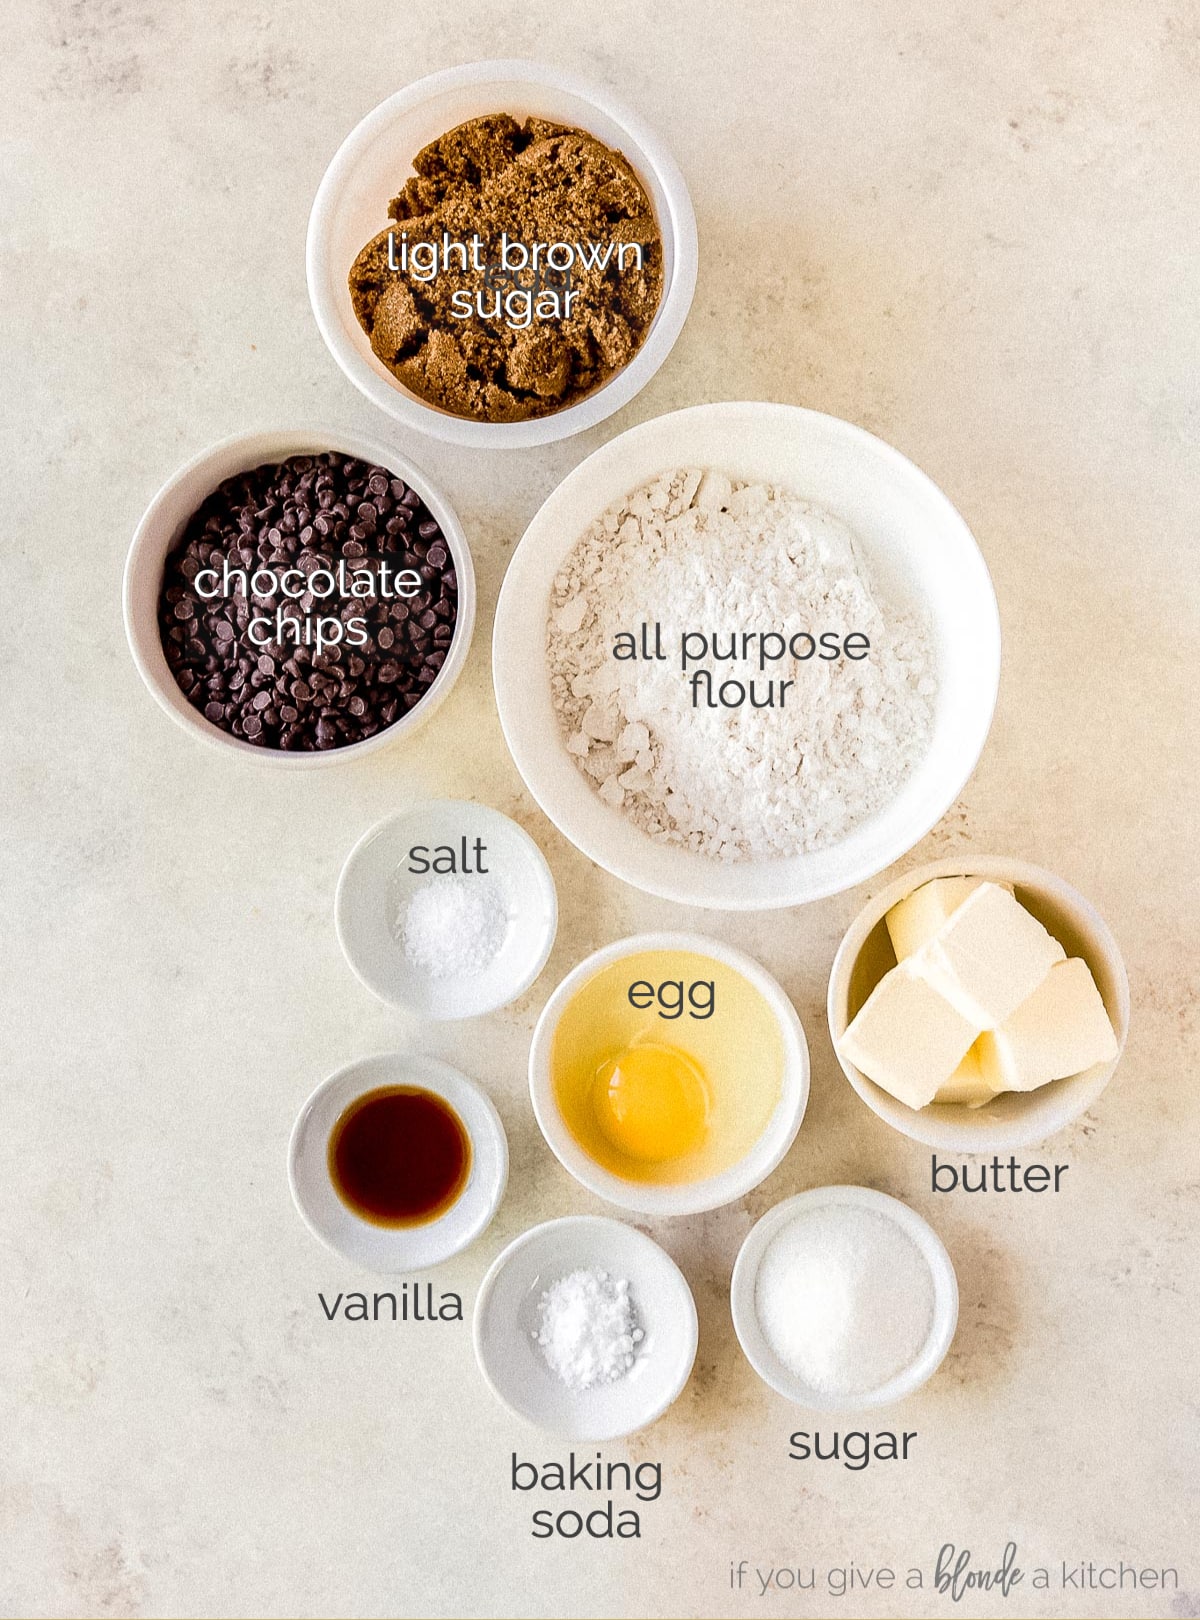
- Mini chocolate chips: These are the traditional chips used in Chipwiches! They are also a lot easier to eat when frozen.
- Homemade vanilla ice cream: You can also pick some up from your local ice cream shop or buy your favorite store-bought brand.
- Brown sugar: To make the cookies chewy, use light brown sugar in the dough.
- Baking soda: This leavening agent helps the cookies rise and spread. Check that it’s fresh and not expired for best results.
- Butter: Use unsalted butter that is room temperature. Different brands of salted butter have various amounts of salt added so it’s best to control the amount yourself and add it separately.
Refer to the recipe card for the full list of ingredients and measurements.
Recipe Variations
Use a different ice cream flavor. Vanilla is classic, but chocolate, cookie dough or cookies n’ creme are equally delicious options!
Add extra mix-ins. Consider adding 1/2 cup chopped nuts or mini M&M’s to the dough. They also stick to the sides of the outside of the sandwich well. Another fun option is sprinkles, which I use for my birthday ice cream sandwiches.
Double the recipe. Be prepared for summer and bake a double batch of Chipwiches. Simply double the ingredients and keep extra sandwiches in the freezer until ready to eat.
How to Make Cookie Ice Cream Sandwiches
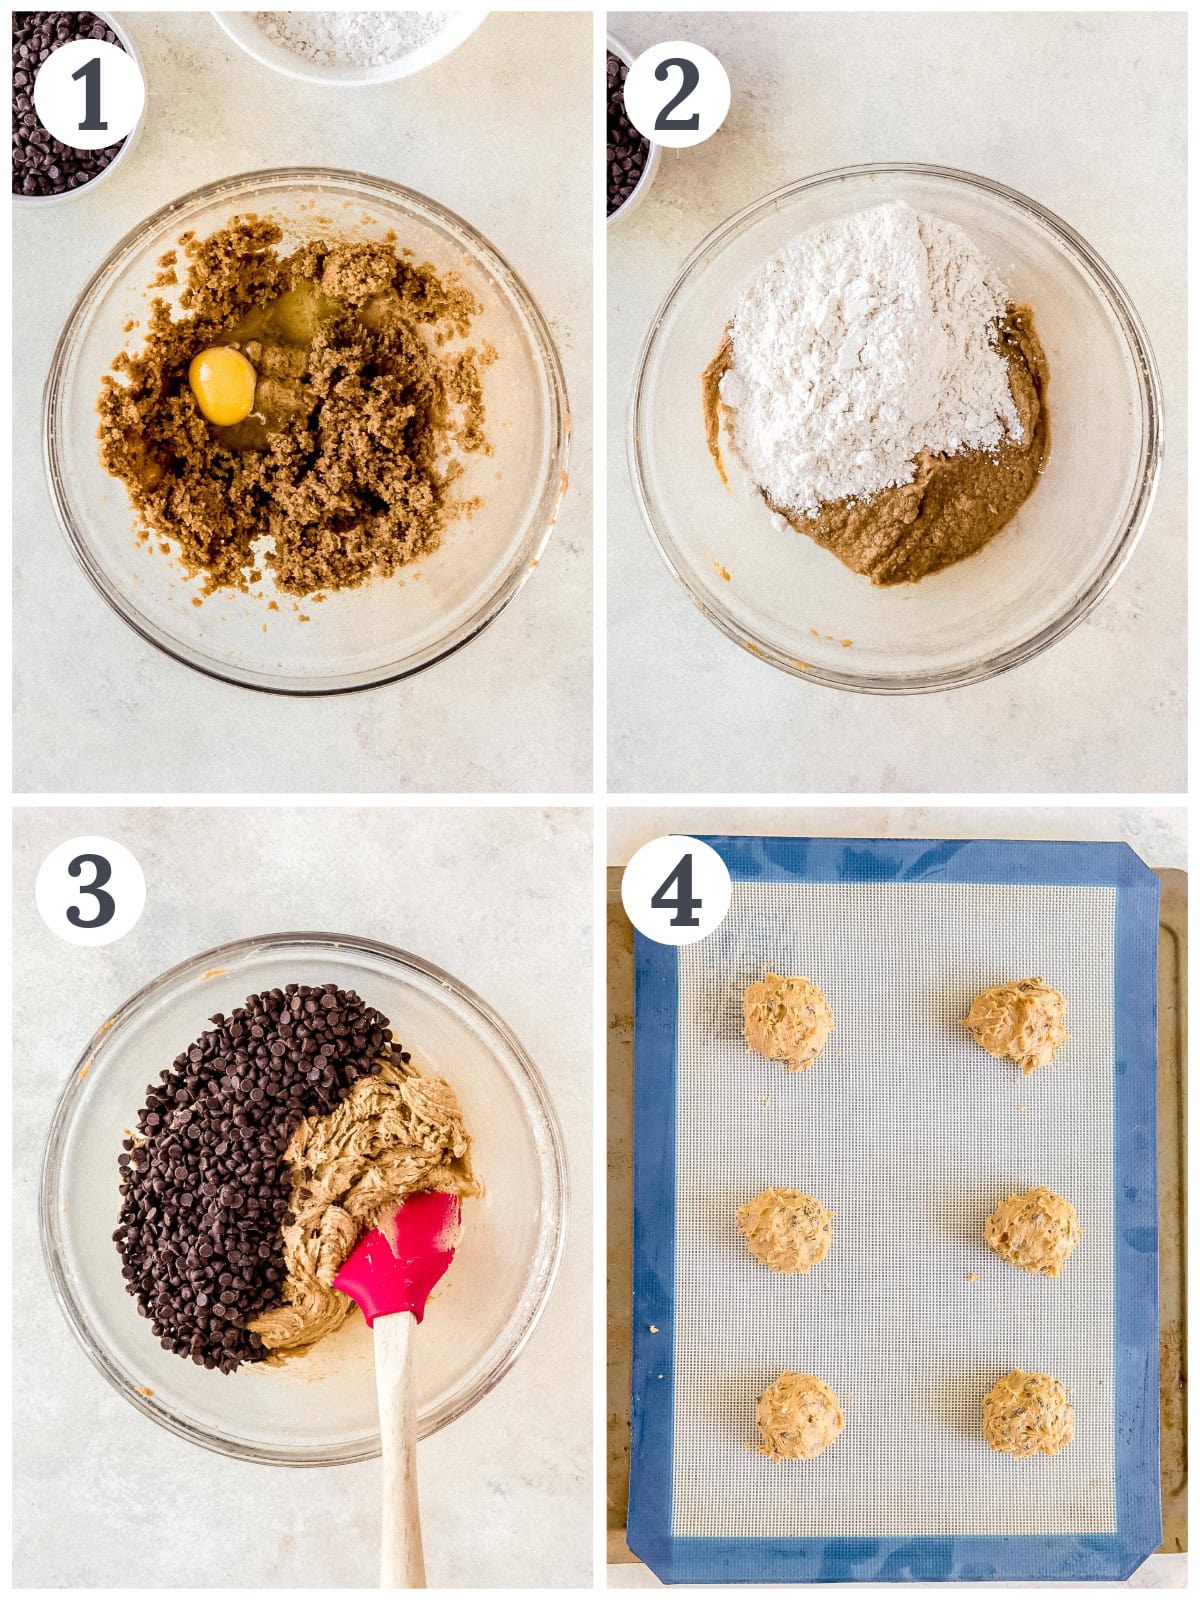
- Beat butter, brown sugar and sugar until light and fluffy. Add the egg and vanilla, then mix until combined.
- Whisk together the flour, baking soda and salt, then add to the wet ingredients. Mix just until combined.
- Stir in 1 cup mini chocolate chips to the dough.
- Roll the cookie dough into balls, place them on a baking sheet and press each ball of cookie dough down slightly. Bake the cookies at 350 F for about 10 to 12 minutes. Let them cool completely.
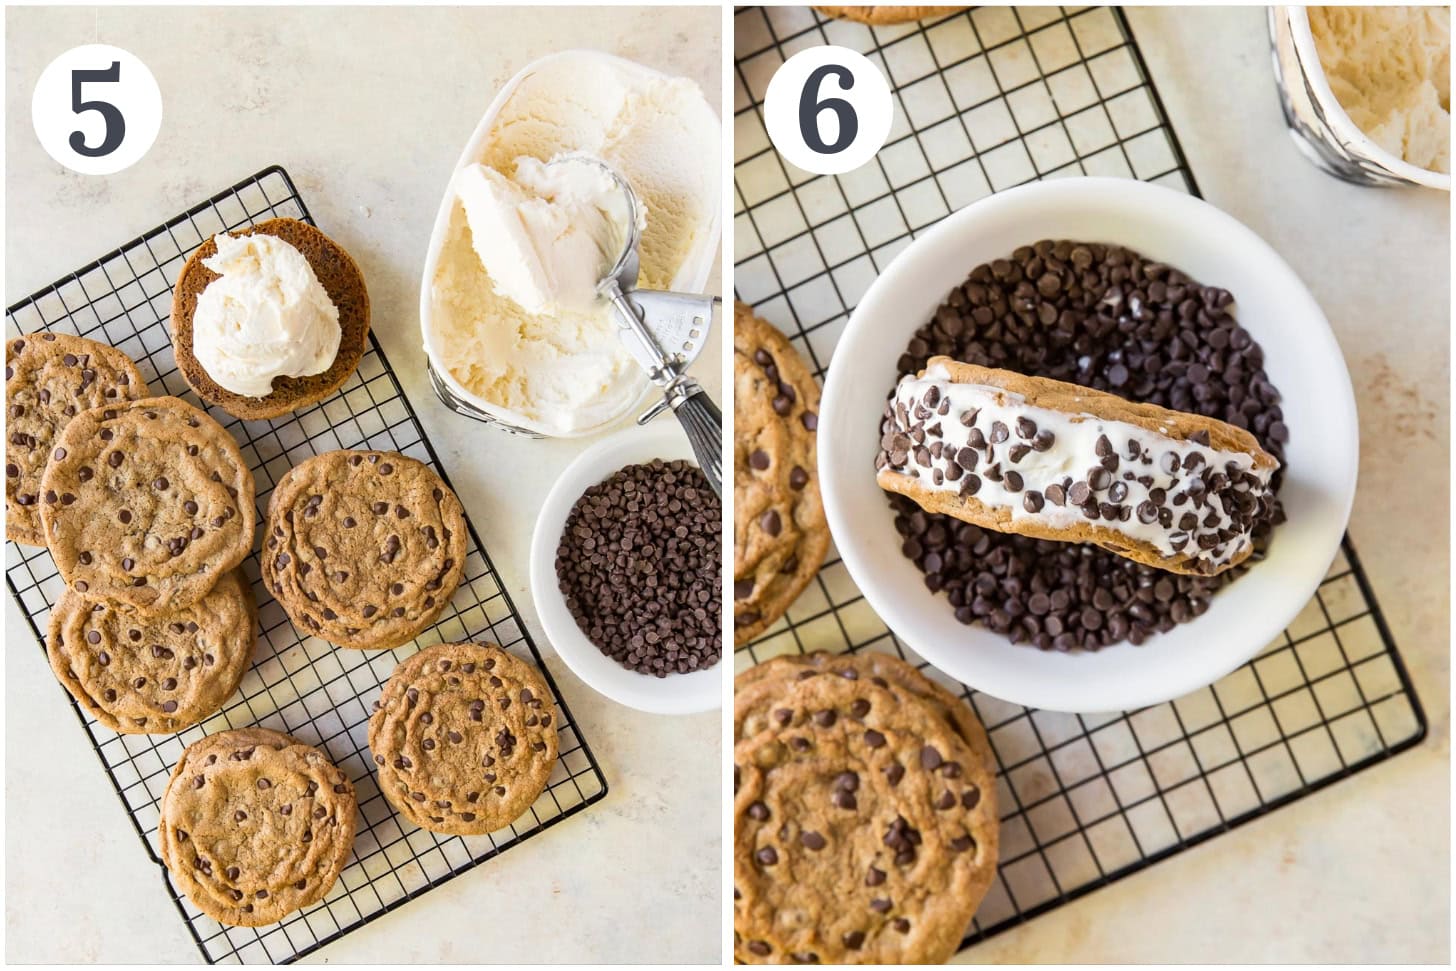
- Freeze the cookies for 20 to 30 minutes. To assemble, take one cookie and place a scoop of ice cream on it. Place another cookie on top and press down.
- Roll the sides of the sandwich in mini chocolate chips and serve immediately or freeze until ready to serve.
Expert Tips
Flatten the balls of dough. After rolling the cookie dough into balls, press them down slightly. This will allow the cookies to be a little flatter after they bake and cool. This makes them easier to eat when frozen.
Do not over-bake the cookies. If they are too crunchy or crispy, they will be hard to bite into when frozen.
Freeze the cookies after they’re done cooling. This makes the cookies sturdier and hardens the melted chocolate chips. You need firm cookies in order to sandwich the ice cream in between otherwise they may break.
Let the ice cream soften a bit before scooping. This will make it easier to press the two cookies together.
Do an extra freeze. After assembling, place the chipwiches in the freezer so they are frozen before serving. This makes them less messy when you eat them!

Make Ahead and Storage Tips
Make ahead the dough and keep covered in the refrigerator for up to 48 hours. Baked cookies can also be made ahead of time and kept in the freezer for up to 1 week before assembling. Make sure they’re in an airtight container to prevent them from drying out.
Store in the freezer for up to 1 month. After assembling, put the Chipwiches back in the freezer to harden and set. Then, individually wrap them in plastic wrap and place in a freezer bag or airtight container.
Recipe FAQ
Ice cream sandwiches, also known as “Hokey Pokes,” date back to the late 19th century in Manhattan. They were served as sweet treats to the working class during their breaks. However, the first Chipwich was created in 1978.
The sandwiches should sit at room temperature for a few minutes until soft enough to bite. If they’re still too hard, it’s possible the cookies are too thick or were over-baked.
Yes, but remember to flatten the balls of dough before baking so the cookies turn out flat.

Related Recipes
Looking for more delicious treats? Try these next!
Did you love this recipe? Please leave a 5-star 🌟🌟🌟🌟🌟 rating in the recipe card below and if you REALLY loved it, consider leaving a comment further down the page.

Get the Recipe: Cookie Ice Cream Sandwiches (Homemade Chipwich)
Ingredients
- 1 ¼ cups (156 g) all-purpose flour, measured correctly
- ½ teaspoon baking soda
- ½ teaspoon salt
- 7 tablespoons (98 g) unsalted butter, room temperature
- ⅔ cups (133 g) packed light brown sugar
- ¼ cup (50 g) granulated sugar
- 1 large egg, room temperature
- 1 teaspoon pure vanilla extract
- 1 cup (170 g) mini chocolate chips, for dough
- ½ gallon Vanilla Ice Cream, (homemade or store-bought)
- 1 cup (170 g) mini chocolate chips, for sandwiches
Instructions
Chocolate Chip Cookies
- Preheat oven to 350° F. Line a baking sheet with parchment paper and set aside.
- In a medium bowl, whisk together the flour, baking soda and salt. Set aside.
- In the bowl of a stand mixer fitted with a paddle attachment, beat on medium-high speed the butter, brown sugar and granulated sugar until light and fluffy, about 4 minutes. Scrape down the sides of the bowl when necessary. Add the egg and vanilla. Beat until combined, 20 to 30 seconds.
- With the mixer on low, slowly add the flour mixture to the dough. Careful not to over beat. With a wooden spoon or rubber spatula, stir in the chocolate chips by hand.
- Scoop about 2 Tablespoons of cookie dough, shape into a ball, and place onto the prepared baking sheet. Press down on the dough slightly with your hand or back of a measuring cup. Repeat placing each ball of cookie dough 2-inches apart.
- Bake for about 10 to 12 minutes or until the edges start to turn light brown. Cool on the pan for 5 minutes and then transfer to a wire rack to cool completely. Transfer to the freezer for 20 to 30 minutes.
Assembly
- Place a scoop of ice cream (about 1/4 cup) on the bottom side of a frozen cookie. Top with flat side of second cookie to make a sandwich. Press down until the ice cream reaches the edges
- Place mini chocolate chips in a bowl or on plate. Roll sides of the sandwich in the chips. Serve immediately or wrap tightly in plastic wrap and freeze.
Notes
Chipwich is trademarked by Crave Better Foods, LLC.


